
Why Recording a Videoconference Is Important
Recording a videoconference serves several important purposes within the legal profession. First, it enables the preservation of deposition testimony that may later be used in trial preparation, particularly when a witness or expert is unable to appear in court in person. Second, recorded videoconferences are invaluable for Continuing Legal Education (CLE) programs, allowing legal professionals to review training materials and reference educational content as needed. Third, recording interviews conducted via videoconference can support the hiring process by providing decision-makers with the opportunity to evaluate candidates and assess their suitability for future positions within the firm.
The most effective method for recording a videoconference is through dedicated desktop software. This approach offers several advantages, including greater control over the recording process and enhanced security measures to protect sensitive information. Desktop-based recording solutions also provide organizations with flexibility in managing how recordings are stored, accessed, and distributed to participants. Additionally, by utilizing existing hardware and infrastructure, firms can reduce costs associated with recording and storage while maintaining full ownership and control of the final recorded content.
What is the best Recording Software
After testing various online recording tools and downloadable software, We found that OBS Studio is the best option available.
There are several reasons why OBS stands out from other recording software. First, it’s completely free to use—a significant advantage. Second, OBS gives you full control over where your recordings are stored. After capturing your live video call, you can save it directly to your own hard drive rather than relying on cloud storage on someone else’s server.
Third, this local storage capability provides greater security control over your content. Finally, once you’ve downloaded your recording, you can edit it using any software suite you prefer, giving you complete creative freedom.
Instructions on Recording a Video Conference with OBS
Let’s get started by downloading OBS from their official website. https://obsproject.com/
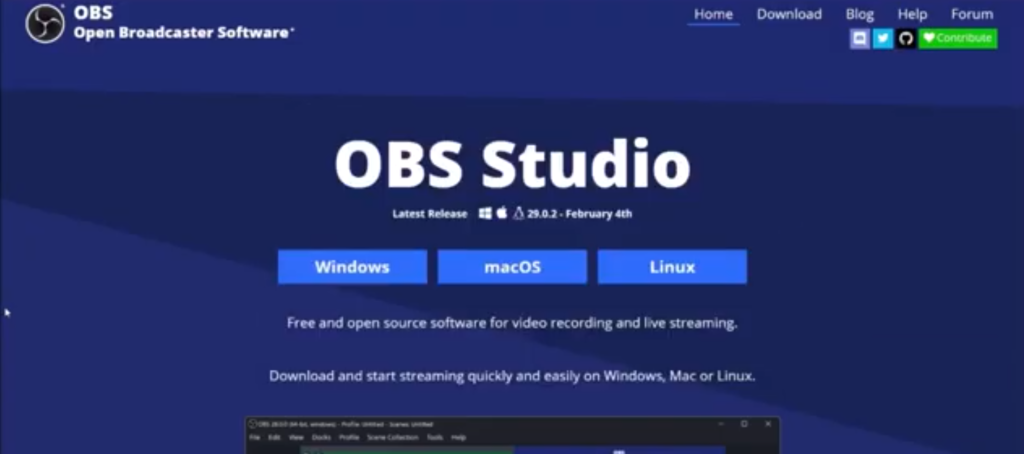
As shown here, you can visit their website to download the OBS software. The first step in installing OBS Studio is determining your operating system. The software supports Windows, Mac, and Linux. Since we’re running Windows, I’ll demonstrate the Windows installation process.
Click on Windows to open the download screen. You’ll see the OBS Studio software downloading to your desktop. Once the download completes, we’ll move on to installation.
Now we’re ready to install OBS onto the desktop. In Chrome, downloads typically appear in the upper left-hand corner. Click on the box with an Arrow and then “Open” to begin the installation.
The installer will ask a few questions to set up OBS on your computer. First, you’ll need to grant OBS access to your system—click “Yes” and then “Next.” Accept the license agreement. Since OBS is open-source and free, there are no hidden costs or restrictions.
Next, choose where to install OBS. I recommend leaving it in the default installation directory, but you can select a custom location if you prefer. Click “Install” to begin the process.
Once installation completes, we’ll configure OBS settings.
The initial setup begins automatically at the end of the installation. When prompted to launch OBS, click “Finish.” A configuration wizard will appear asking how you want to use OBS—for streaming or recording. Select the option to optimize for recording only.
Click “Next.” The wizard will detect your default screen settings—accept these and click “Next” again. OBS will then apply settings based on your computer’s hardware. You may see a Windows disclaimer—simply close it.
You’re now in the main OBS interface and ready to configure your recording settings. When OBS first opens, the canvas area is blank. We’ll add different sources to capture your video conference.
To add sources, look at the “Sources” panel at the bottom of the screen. Click the plus sign to see all available capture options.
You might be tempted to use “Display Capture” as your default option. However, I recommend caution with this choice. Display Capture records your entire screen, including any files, folders, or sensitive information visible on your desktop. If you don’t edit your recording before sharing it, you could inadvertently expose private material.
Instead, I recommend using “Window Capture.” This option captures only a specific application window. Make sure you have your video conference window open before setting this up—I’m using the same Chrome browser we used to download OBS.
Click on “Window Capture.” When prompted to create a new source, you can name it or leave it as the default. Click “OK.” The settings window will appear for your Window Capture source.
If I minimize this settings window, you’ll notice it’s currently capturing our original OBS download screen. However, we want to focus on a different window—in this case, I’ll be using a video conferencing platform as our recording target.
Back in the OBS settings at the bottom of the screen, you can see the video conference window is now set up and ready to record. In the Window dropdown menu, select your Chrome window (or whichever browser hosts your video conference). Enable “Capture Cursor” and “Client Area,” then click “OK.”
The canvas now displays the window where your video call will take place.
For any video call recording, you need to capture two additional elements beyond the visual component: audio input and audio output.
Return to the “Sources” panel and click the plus sign. Add “Audio Input Capture.” This captures your voice as the speaker in the video conference. The default device should work fine, but verify it’s set to your preferred microphone—in my case, the high-definition microphone.
Select your microphone and click “OK.” If you have multiple microphones connected, choose the one you want to use for recording.
Once added, the audio input appears in the Audio Mixer panel. You can adjust the sound levels here. If the meter shows red, reduce the volume to prevent distortion and ensure clear audio quality.
Next, add the audio output source. This captures the voices of other participants in your video call. Click the plus sign in the “Sources” panel again and select “Audio Output Capture.”
Create a new source and click “OK.” The default will be your system speakers. Verify the correct speaker device is selected and click “OK.”
You’ve now configured the three essential elements for recording a video call: the visual component (Window Capture), your audio input (microphone), and audio output (speakers for other participants’ voices).
Before you start recording, there’s one more important setting to configure. Look at the “Controls” panel on the far right side of the OBS interface. Click on “Settings” to open the configuration menu.
In the Settings window, navigate to the “Output” tab. OBS has a default recording path where it saves your videos. However, I strongly recommend changing this setting. It’s easy to lose track of where your recordings are stored if you use the default location.
Click “Browse” next to the Recording Path field. Navigate to your desktop and create a dedicated folder for your recordings—I’ve already created one called “Recorded Videos.” Select this folder.
Choose a location you’ll remember. This ensures you can always find your recordings quickly.
The other settings—Audio, Video, Accessibility, and General—should be fine at their defaults. You can make additional adjustments if needed, but the standard settings work well for most users.
One final important setting: the recording format. I recommend selecting “MP4” as your recording format. While OBS may not be able to repair a corrupted MP4 file, this format makes your recordings immediately usable after you stop recording.
Click “Apply,” then click “OK.” Your setup is complete.
To begin recording, simply click “Start Recording” in the Controls panel. OBS is now capturing everything.
Minimize the OBS Studio window and start your video call. I’ll create a test call for demonstration purposes.
We’re now recording our video conference. You can see the actual live recording in progress. At the bottom of your screen in the taskbar, you should see the OBS icon indicating that recording is active.
This is the best solution for recording live video conferences—whether you’re capturing legal depositions, creating training materials, or producing educational content. OBS Studio provides professional-quality recordings with complete control over your content.
Thank you for watching.
Video location https://youtu.be/dJgQvJ1PyVw


0 Comments